Being a first time DIYer, I have not found many online examples of how to DIY staircase railing. I also discovered that staircase railing is not for the faint of heart. Here I will attempt to write about what I’ve done. I am very aware that staircases come in a wide variety of shapes and sizes, so there isn’t just a one size fits all.
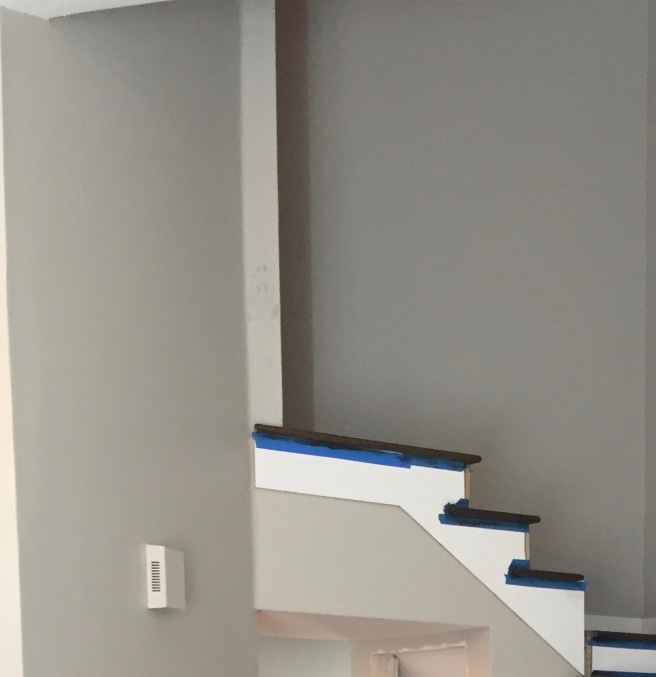
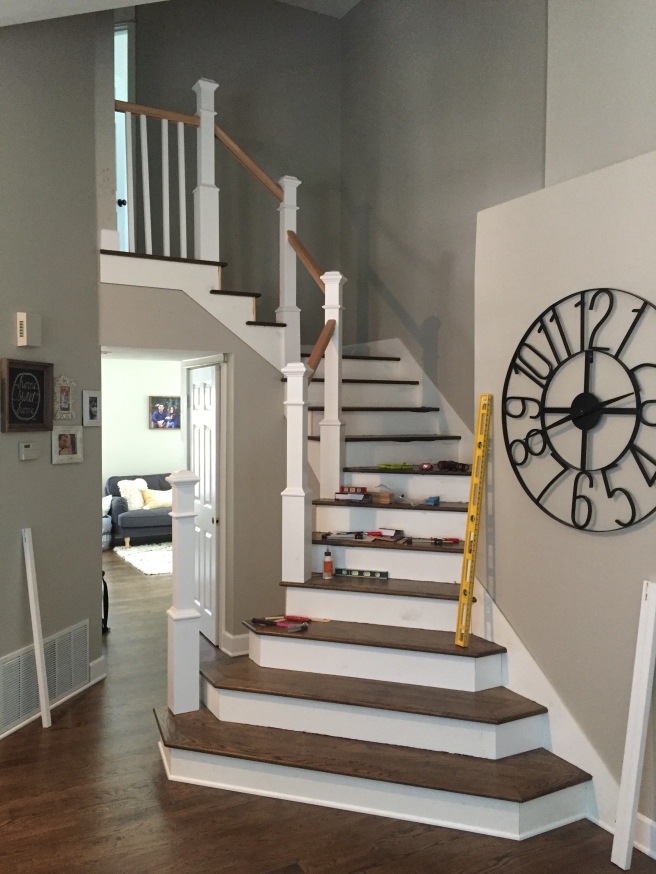
Since I’m doing a fixer upper I might as well start with what it looked like
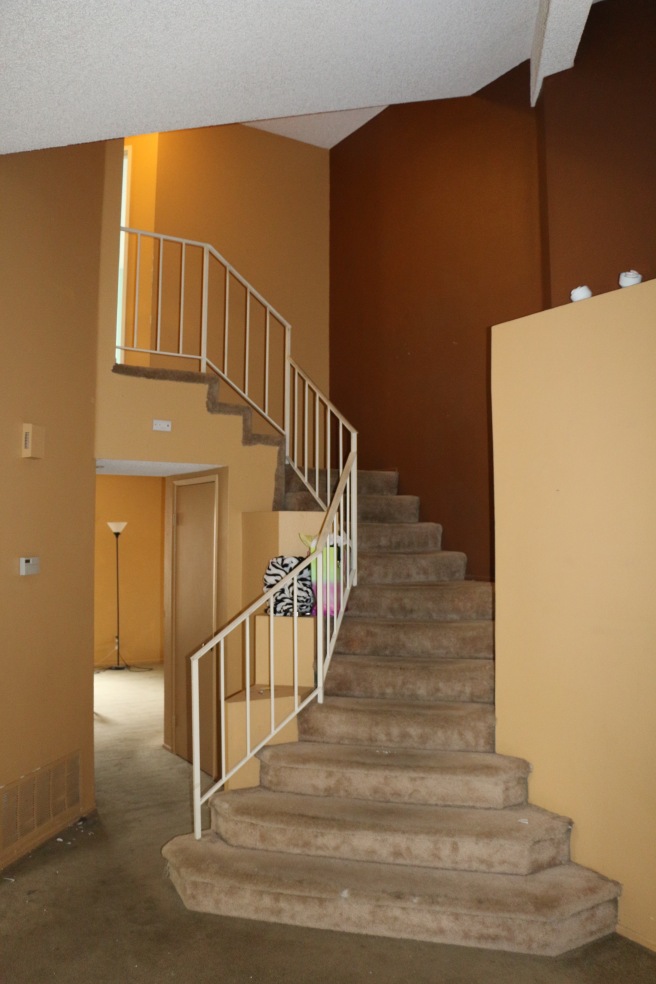
I know she’s a beauty. Anyway it is a little hard to tell from this picture but the staircase has two 45 degree turns and then one 90 degree turn. Honestly it seems simple but it adds complication to the install of the flooring and deciding where the newel posts will go. In regards to the flooring we decided on an unfinished 3 1/4″ wide 3/4″ thick white oak hardwood. (That’s a completely separate animal but lots of tutorials online)
Here is a during photo
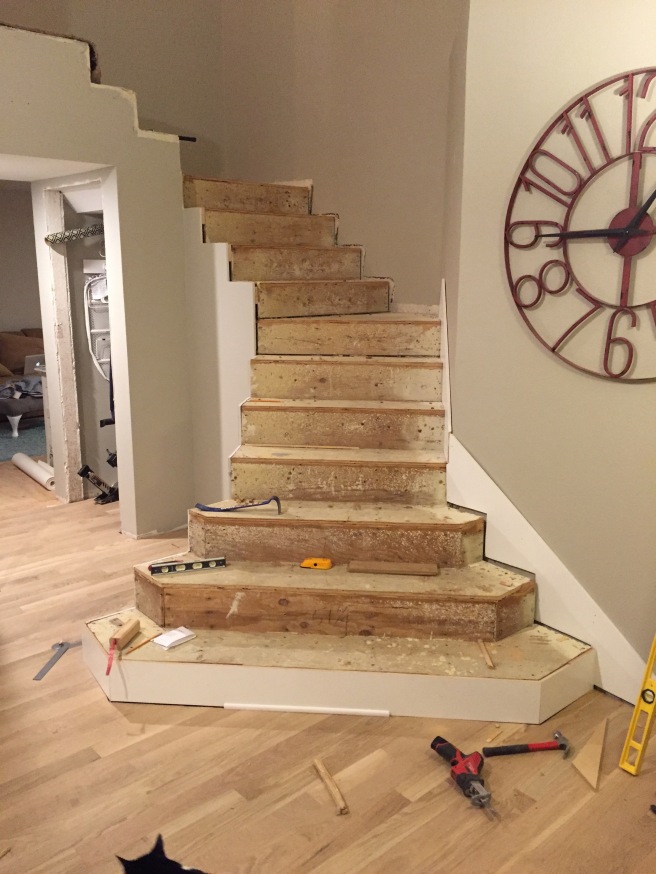
You can also see the decorative boxes on the side of the staircase were removed. I’m showing this picture because I don’t want anyone to think we were as lucky as other people who pulled up their carpet and had beautiful hardwood underneath. (Shout to my cat for photobombing)
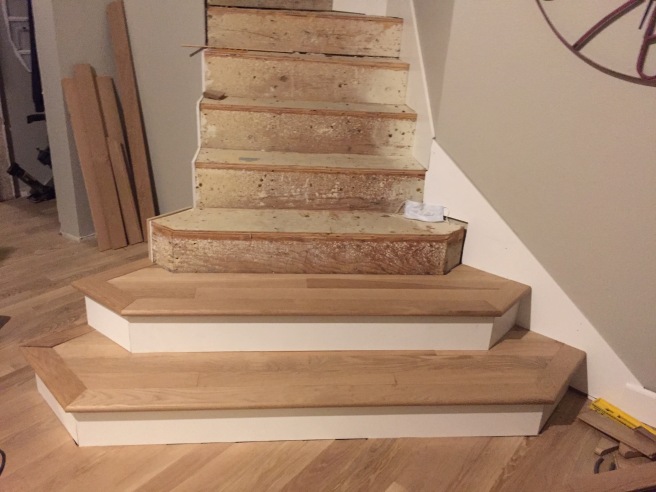
Then while installing the wood on the stairs I specifically cut out both the stair noise (one of the two is shown in the picture bellow) and newel trim (the one that came with the newel post) to fit nice and tight. I did this for the 90 degree turn and one of the 45 degree turns. I have a different solution for the second 45 degree turn.
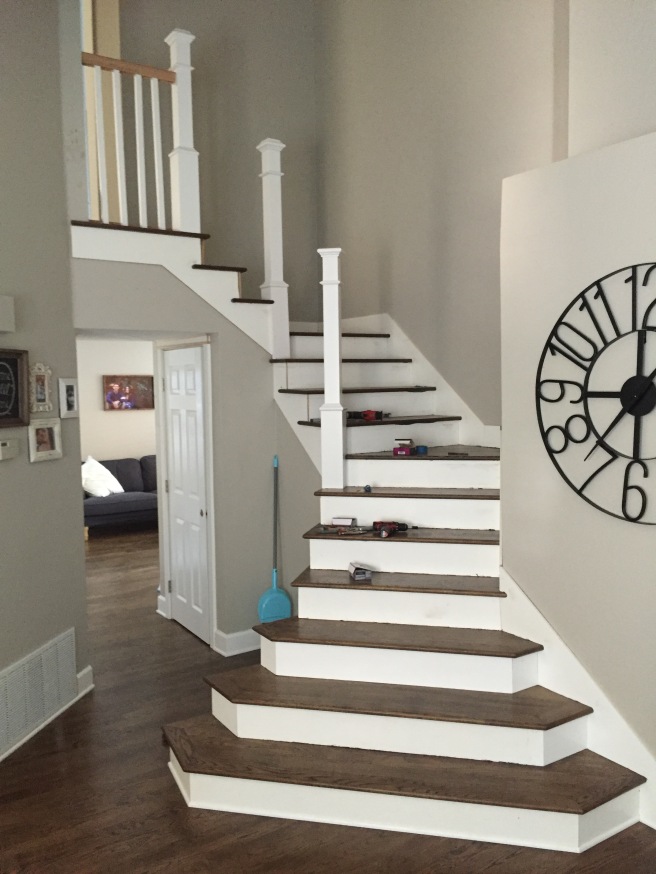
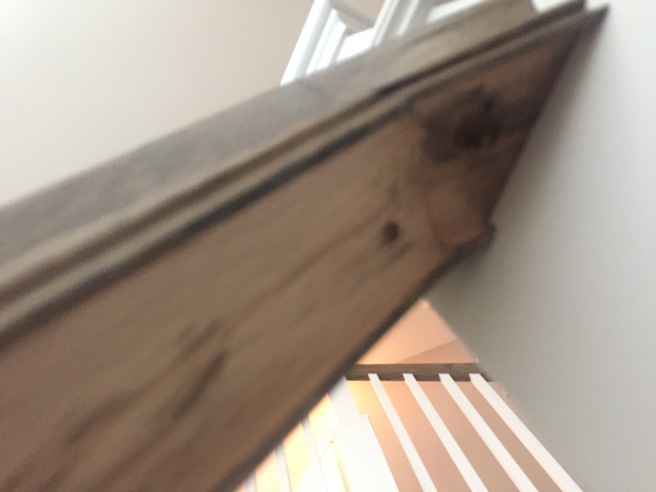
Unfortunately I don’t have a picture of the stairs after being finished from the same perspective as previously shown, so here’s one from standing on top and seeing part of the stairs.
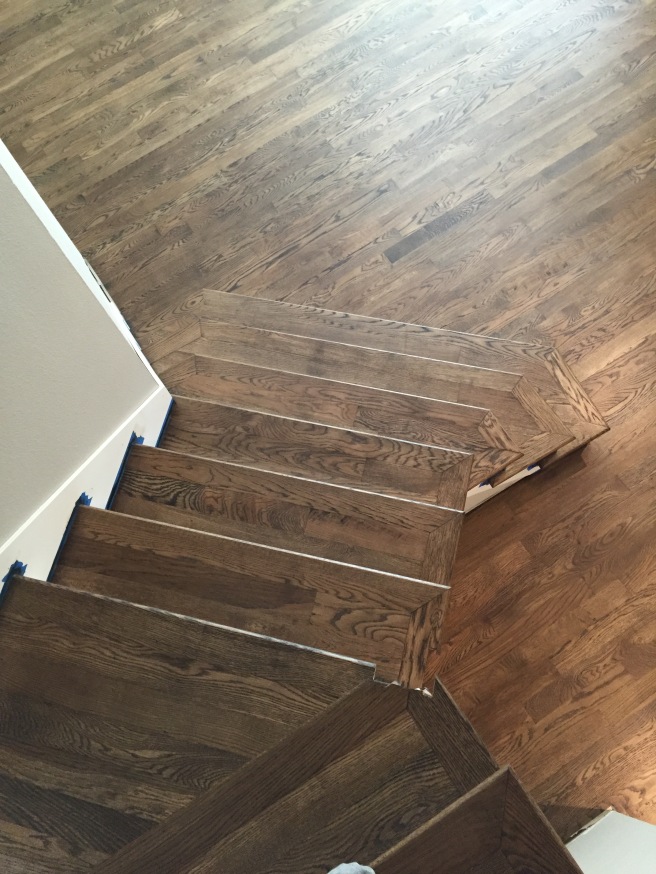
From here you can see the two 45 degree turns and how one of them is cut to accept the newel post trim and the other one isn’t.
Parts I’m using for the railing:
1 1/4″ square spindles
R-6010 red oak plowed hand rail (I got it from Lowes)
Square newel posts (also from Lowes)
Finally, getting started on the handrail part. Since the railing is not a simple project I am going to assume you have the skill to do a lot of the math for yourself. For example before I started I drew out plans to know exactly where I should put the center of each spindle and the location of the newel post. This needs to be planned out because (1) I want these spindles to be evenly spaced (obviously) and (2) they need to be spaced to code. In California the distance between the inside of spindles needs to be less than 4″ for safety. Here is a good link/handbook to help with the spacing of spindles and other aspects of building railing for a staircase. Since I mentioned the code I will add that the railing should be able to withstand 200 pounds of force in any direction.
I’m starting at the top of the staircase, where the railing meets the wall and work down from there.
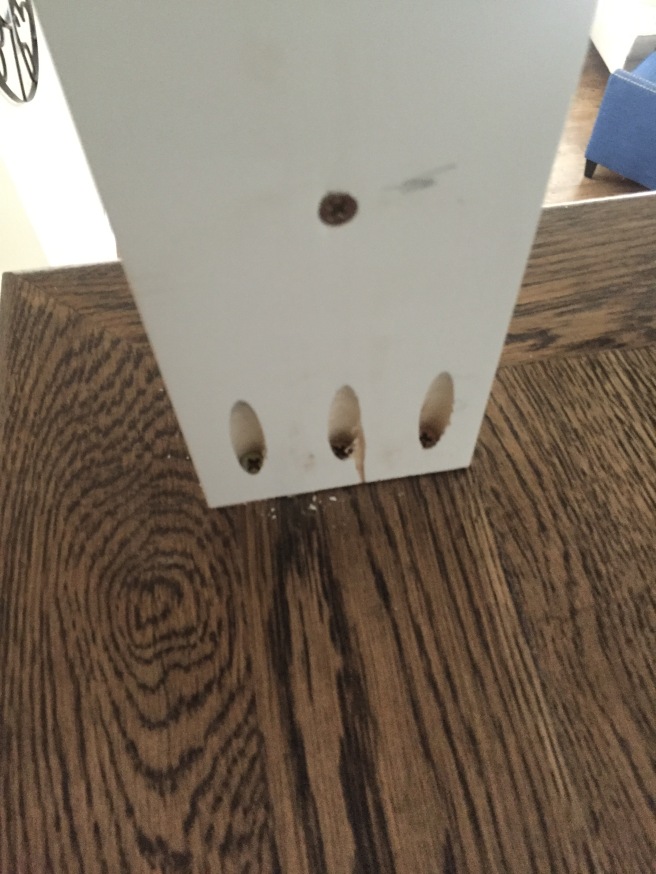
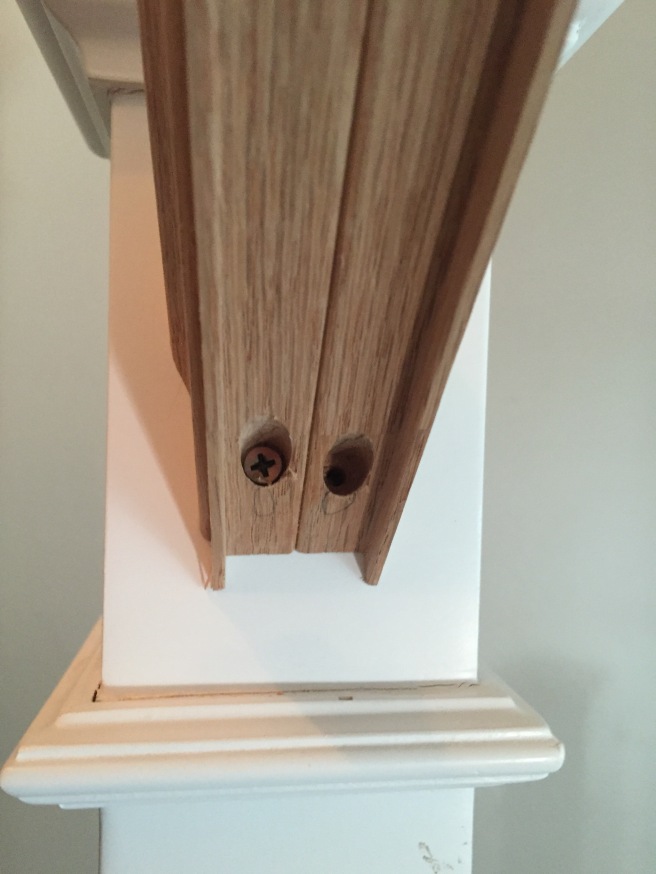
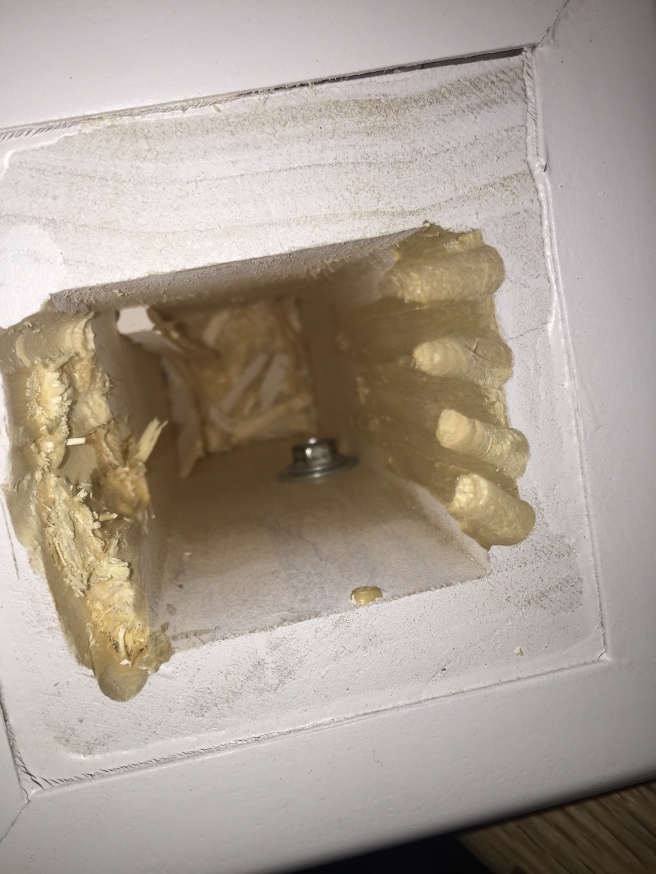
After I had the correct position of the newel post and spindles the first step was to install the newel post. Unfortunately I didn’t have pictures of every step, which I know helps.
My newel posts came with a wood insert to help give it strength (The wood piece is about 6″ is long and is in the picture above on the first step with red plastic coming off of it) and I used pocket holes and a dowel to install it. I then put 3 pocket holes on each side of the newel post itself and screwed it in as shown bellow. The screw in the middle is going into that 6″ wood piece. Keep in mind there is a trim piece that slides up and down to cover all these holes.
For this small area at the top of the stairs where it is flat I decided to put the spindles in first and then the handrail itself. I decided to do this based off of a Bob Vila video I found (they make it look sooooo easy). For the rest of the railing it will be sloped down and I put the railing first and then the spindles.
In regards to installing the spindles, the ones I bought came with a 1/4″ diameter hole for a dowel. I ended up drilling it out to 3/8″ hole so I could use a thicker dowel. I also drilled corresponding holes in floor for the dowels and used wood glue to install them.
Now to install the banister. The challenge is securing a horizontal hand rail to the wall and newel post after putting in the spindles. There are a few gadgets on the market for doing this but I think I came up with a good solution.
Some people might say attaching the handrail to the newel post is easy because all I have to do is put a long screw (about 4″ like they did in the Bob Vila video from above) from the opposite side of the newel post into the handrail. I did not want a screw head sitting out, or even with a sunken head and cover it. My goal is to keep everything looking as seamless and clean as possible. No, I haven’t been perfect during this renovation but I’m trying. One might also think that I could just use pocket holes on the under side of the handrail, which would have worked but there was no room with the spindles already in place.
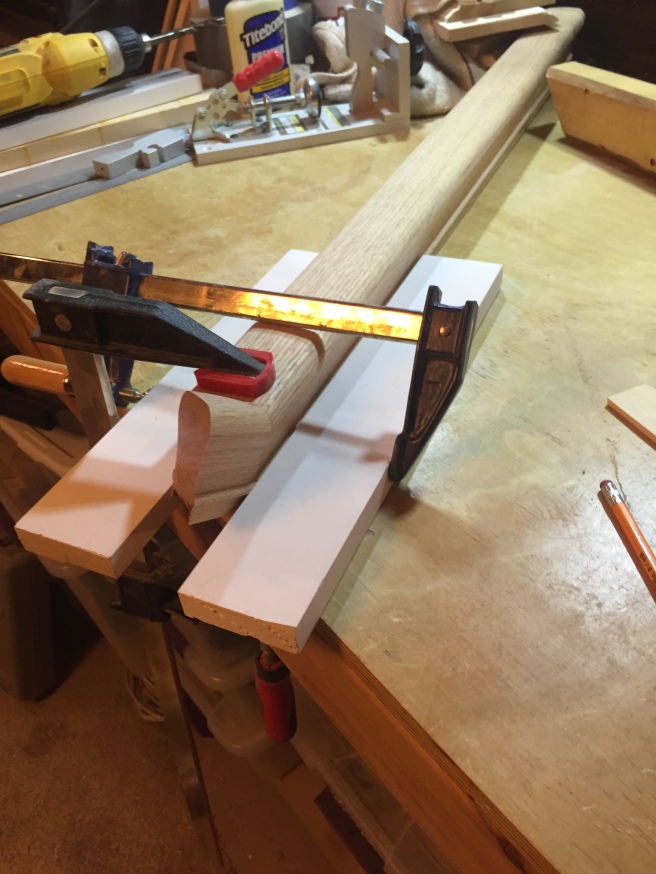
So my idea is to partially screw a bolt with a washer on it to the wall and then sliding the handrail over the bolt and into a pocket that I made in it. Here are those pictures. Hopefully they are fairly self explanatory. I used a drill with a 1″ spade bit (since my plow was 1 1/4″ wide) and a router with a 5/16″ bit.
I clamped the banister upside down to my work bench so it wouldn’t move (obviously) and in a way that I didn’t damage it since it will be stained. To start I drilled a small pilot hole, just to be careful.

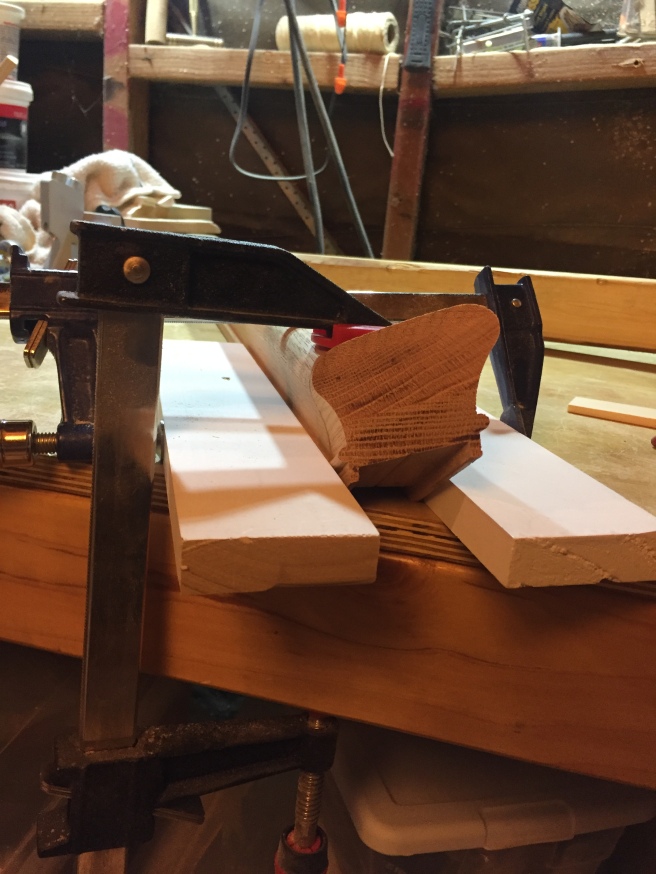
Then used the 1″ spade bit to make the main cavity. This photo is half way through. My hole was just over an inch deep and the handrail was about 2 1/4″ tall so I had plenty of space and there’s plenty of strength remaining.
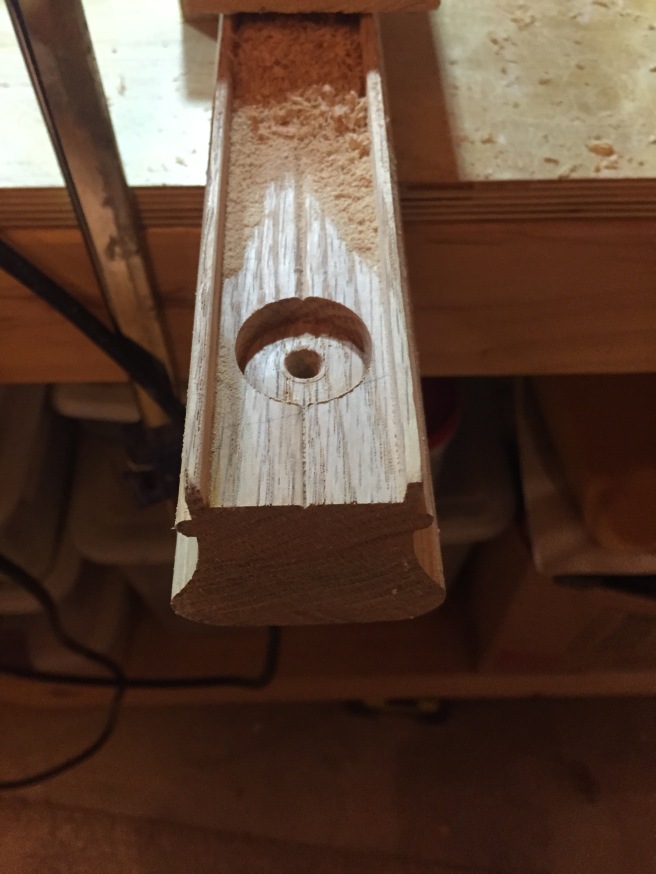
Keep in mind this is oak so I took my time. Didn’t want to ruin anything, tool or wood. Next comes a perpendicular groove/hole into the cavity that is here. In order to do this I used the router but first I drilled out some of the material with a 5/16″ drill bit just because it is oak and is a hard material.
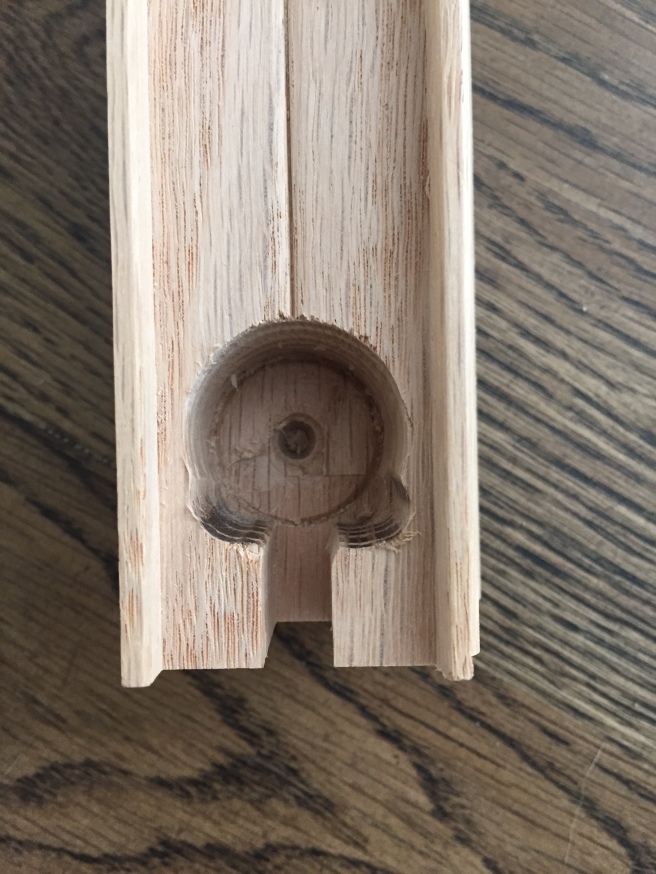
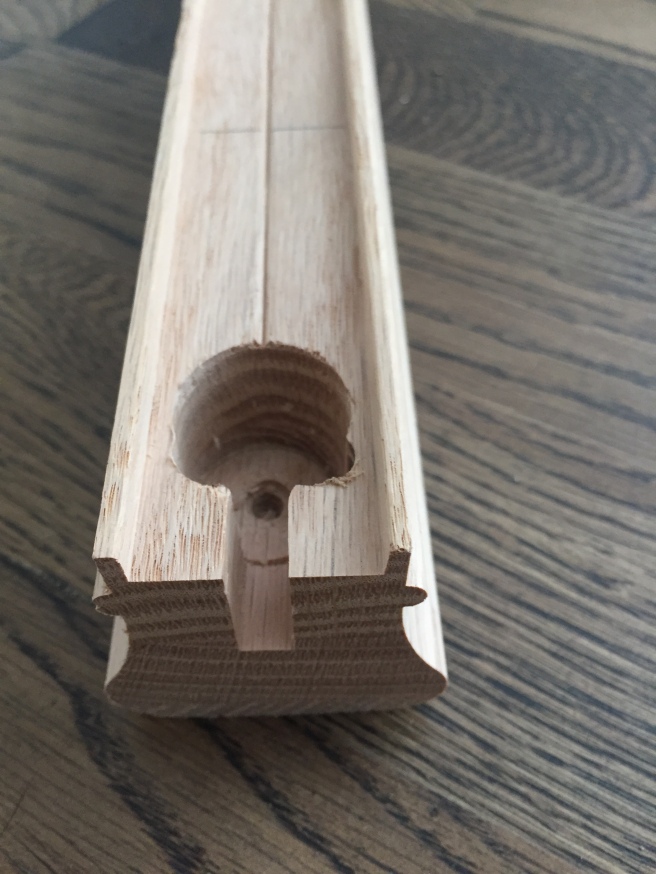
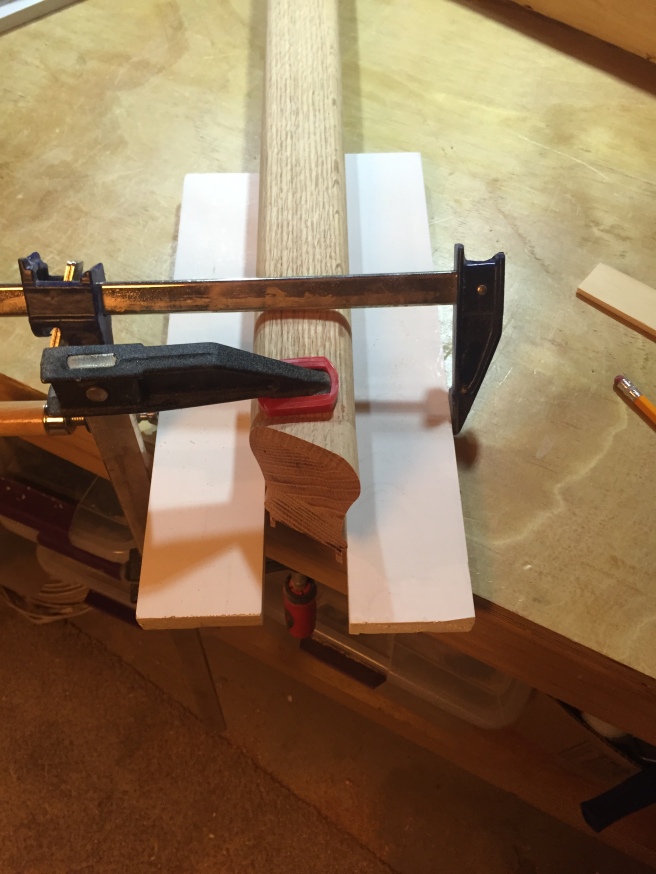
Here you can see the groove/hole/collar I made with the router. This is where the head of the bolt will sit (with a washer) and the 1″ hole I made is enough room to turn the bolt about 1/6th of a turn. Which is plenty. You can also see in the top image that the 1″ hole isn’t round, I used the router to try and flatten that side out so that the washer will sit flat.
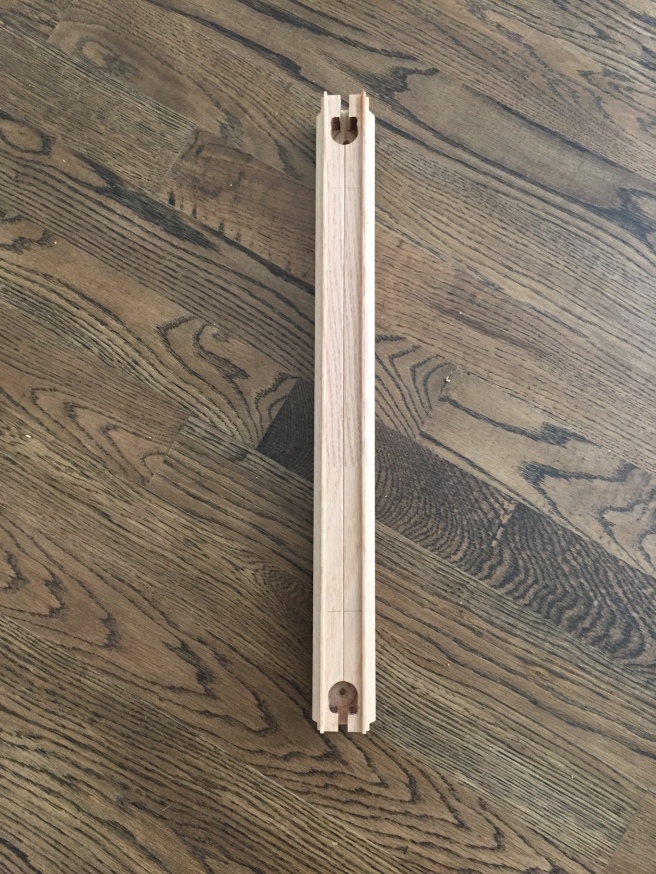
Here is the whole piece. You can see I did this for both sides. The thickness of the collar or the wood that sits between the wall/newel post and the washer/bolt head is about 3/4″. Again oak is really hard so this is plenty of material for strength.
If this isn’t making much sense look at it in action in the picture below.
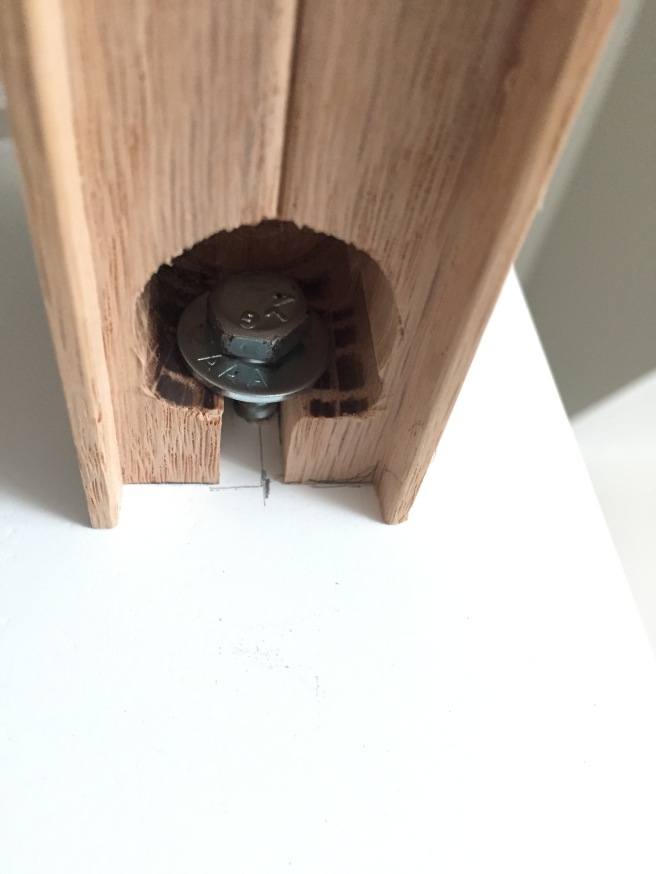
Here you can see the 1/4″ bolt (2″ long) with a 7/16″ head and appropriate sized washer. You can see the grove (that was routered into the banister) allowed the bolt to just slip right in (for both sides) and since the spindles were already there those just slide right into place too. Then I tightened each bolt on both sides. This fastening was super strong. What I really like about this technique is that I had some play with that grove I made. So I could easily align the banister.
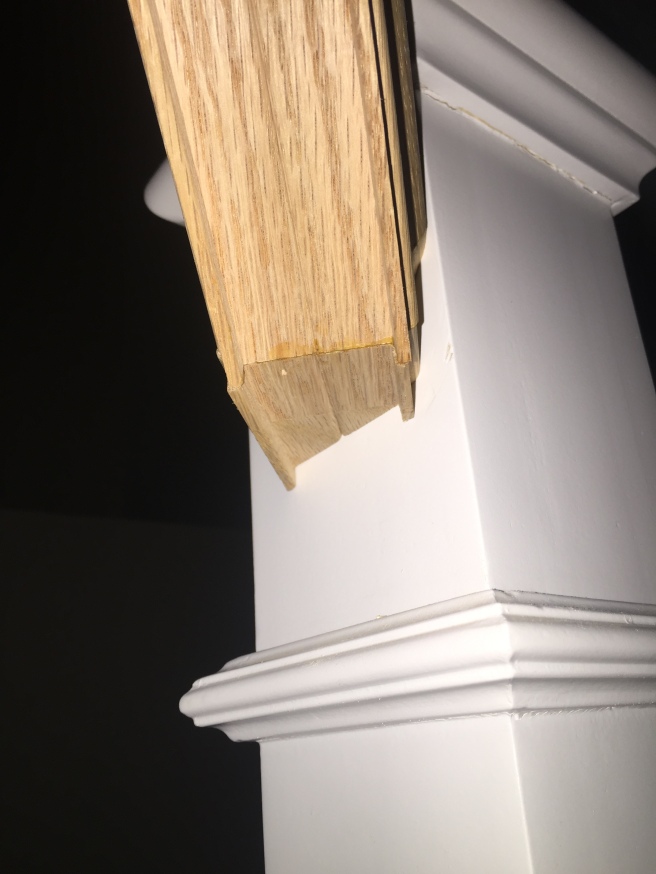
Next I systematically installed the next newel post. The method I used to installed it was similar to the previous one with pocket holes but because the stairs turn 90 degrees I added a few screws into the sides. I used a very similar method to install the newel post after that which was at a 45 (or 135) degree turn. Both newel posts are in the picture below.
Similar to the first newel post, the trim sleeve slides up and down to fit in just right. When I say fit just right I mean it was super tight and I had to push it down hard and now don’t want to try and pull them up to take a picture.
The next banister I installed I used pocket holes instead of bolts. I used pocket holes for the top and bottom. Again I used the same pocket hole jig. I find holding the banister in place while drilling in the screws was challenging but it works. Also note that I only installed one screw because I will be removing all of the banisters to stain and clear coat them separately.
Since this banister and the rest are angled parallel to the stairs I decided not to use the bolt slide method anymore. Although those bolts were so nice to work with.
The next banister is going to make a 45 degree turn into the bottom newel post. Now, anyone who has dealt with a compound angle knows that this is going to require 2 pieces of the banister.
So to say in words, the top of the banister has an angle cut at 37 degrees, the bottom needs to be a 18.5 degree cut, a second piece of banister has the same 18.5 degree cut and finally at the end of the second piece has a 45 degree horizontal turn in it. In order to join these two pieces of wood I used glue and clamps to join them. Here are some pictures.
In order to install this banister I used pocket holes for the top (not shown in pictures) and a bolt at the bottom. Basically I thought it would be a good idea to use a long bolt and washer to fasten through the first (short) piece into the longer piece. Here is a picture to show where the bolt went.


So I drilled a hole in the newel post as shown, and then a starter hole in the banister (not show). There was a little problem though, my ratcheting wrench wouldn’t ratchet. There wasn’t enough room, so I cut into the newel post. Lucky for me there’s a cap that will cover it.
After a lot of ratcheting (not the worse) I had the piece installed. I then drilled the top pocket hole in very carefully. I should mention that using this pocket hole method is a challenge since the very shallow angles (at the top of each banister) makes the piece want to move. I used clamps and shims to try and hold the banister in place.
Here is an overexposed bad picture of the bottom of this compound piece.
Here is a general picture of that banister along with the next one installed. You can see that the lowest installed banister post goes straight which means there was no compound angles and I just used pocket holes again.
The final section of banister had another compound angle in it and this time I used a screw to attach it to the newel post. I don’t have many pictures. I did drill the hole in the compound angle section of the banister by hand without any jig. I simples started with my smallest drill bit (1/16″) and went up. Below is a blurry picture where you can see the screw going through the bottom of the banister into the newel post. Yes it is stained and yes there are some spindles already installed.
I also used 2 inset screws to join the small compound angle piece of banister to the larger piece (screws not shown). It seemed to work well, it is an alternative method to gluing the piece like I did above.
I should mention that the screws I’ve been using are wood screws size 1 1/4″ to 3″ depending on the angle of the hole.
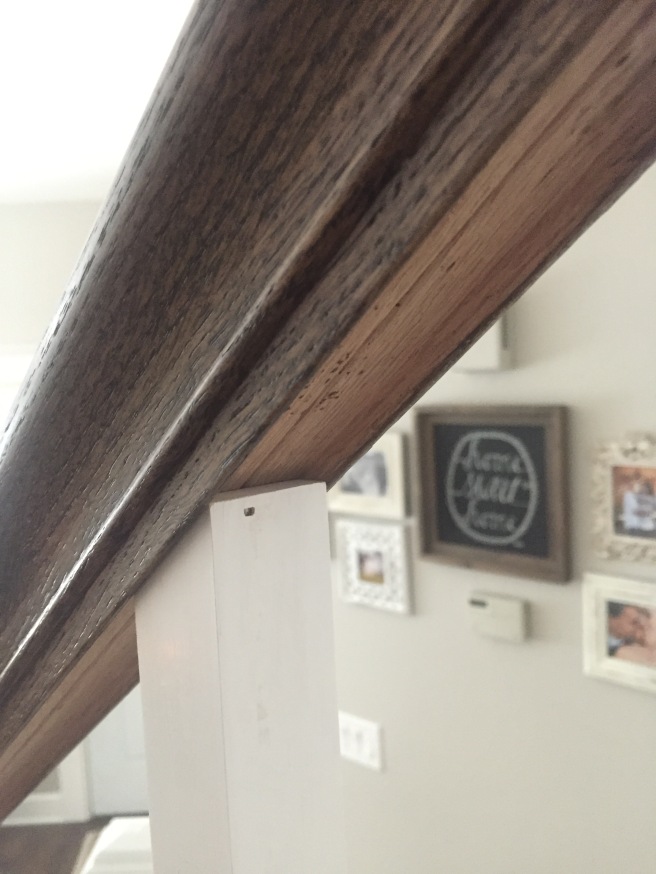
Here are some close up pictures of the compound angle and all of the banisters installed. Yes they are stained in this picture.


As mentioned above, I removed the banister pieces in order to sand, stain, and seal.
Here is a picture of my set up I used to let them dry after staining and clear coating.
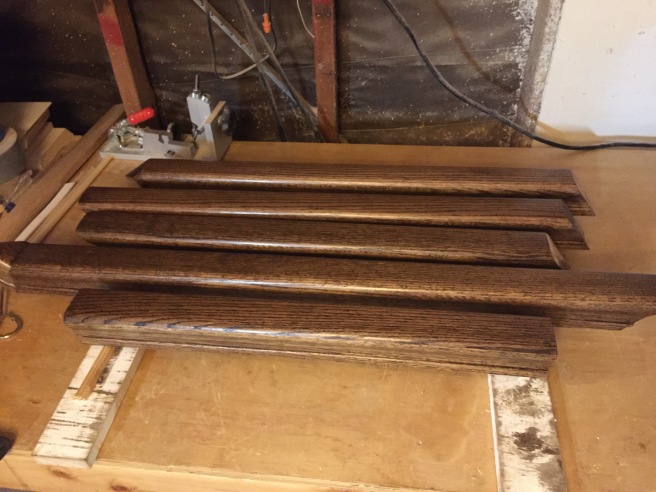
If you were wondering I sanded the banister from 80 grit to 220 grit. This came in real handy for the 2 pieces that had the compound angle piece because of course nothing cuts and join perfectly, the sanding allowed it to look much more seamless. I used dark walnut Minwax stain (same that I used on my hardwood floors) and then I just used an indoor clear coat and applied 4 layers. After the second and 4th layer I did a very genteel sanding with 400 grit sand paper to keep the surface very smooth.
Once I reinstalled all of the banister pieces I began installing the spindles and the filler pieces (I did stain and seal those at the same time as the banister) for the plowed area of the banister.
I used 18 gauge 1 1/4″ nails. I shot them in at the top so that it could be covered by the filler pieces (shown below). I also shot the bottom of the spindles into the floor around a 45 degree angle (not shown). Surprisingly these were very strong.
Finally there is the finished product.

It felt so good to complete this and to know I won’t be falling off that side of the stairs.
Let me know if you have any questions and I will do my best to answer them.
